Yay! I love this time of year… the plants are all blooming and the sun feels warmer than it has in months. The homesteading and farm supply store I work at is booming with customers anxious to get their gardens and spring / summer projects underway. It’s a lovely time to go into work and be surrounded by such a wonderful and motivating atmosphere.
One of the most exciting events at the store is the arrival of the Chick Calendar! It shows which chick breeds will arrive which weekend starting in April. Customers have questions about everything-chicken, and luckily for them I could talk chicken all day!
So as my first official blog post, lets talk chickens! Fuck yeah!
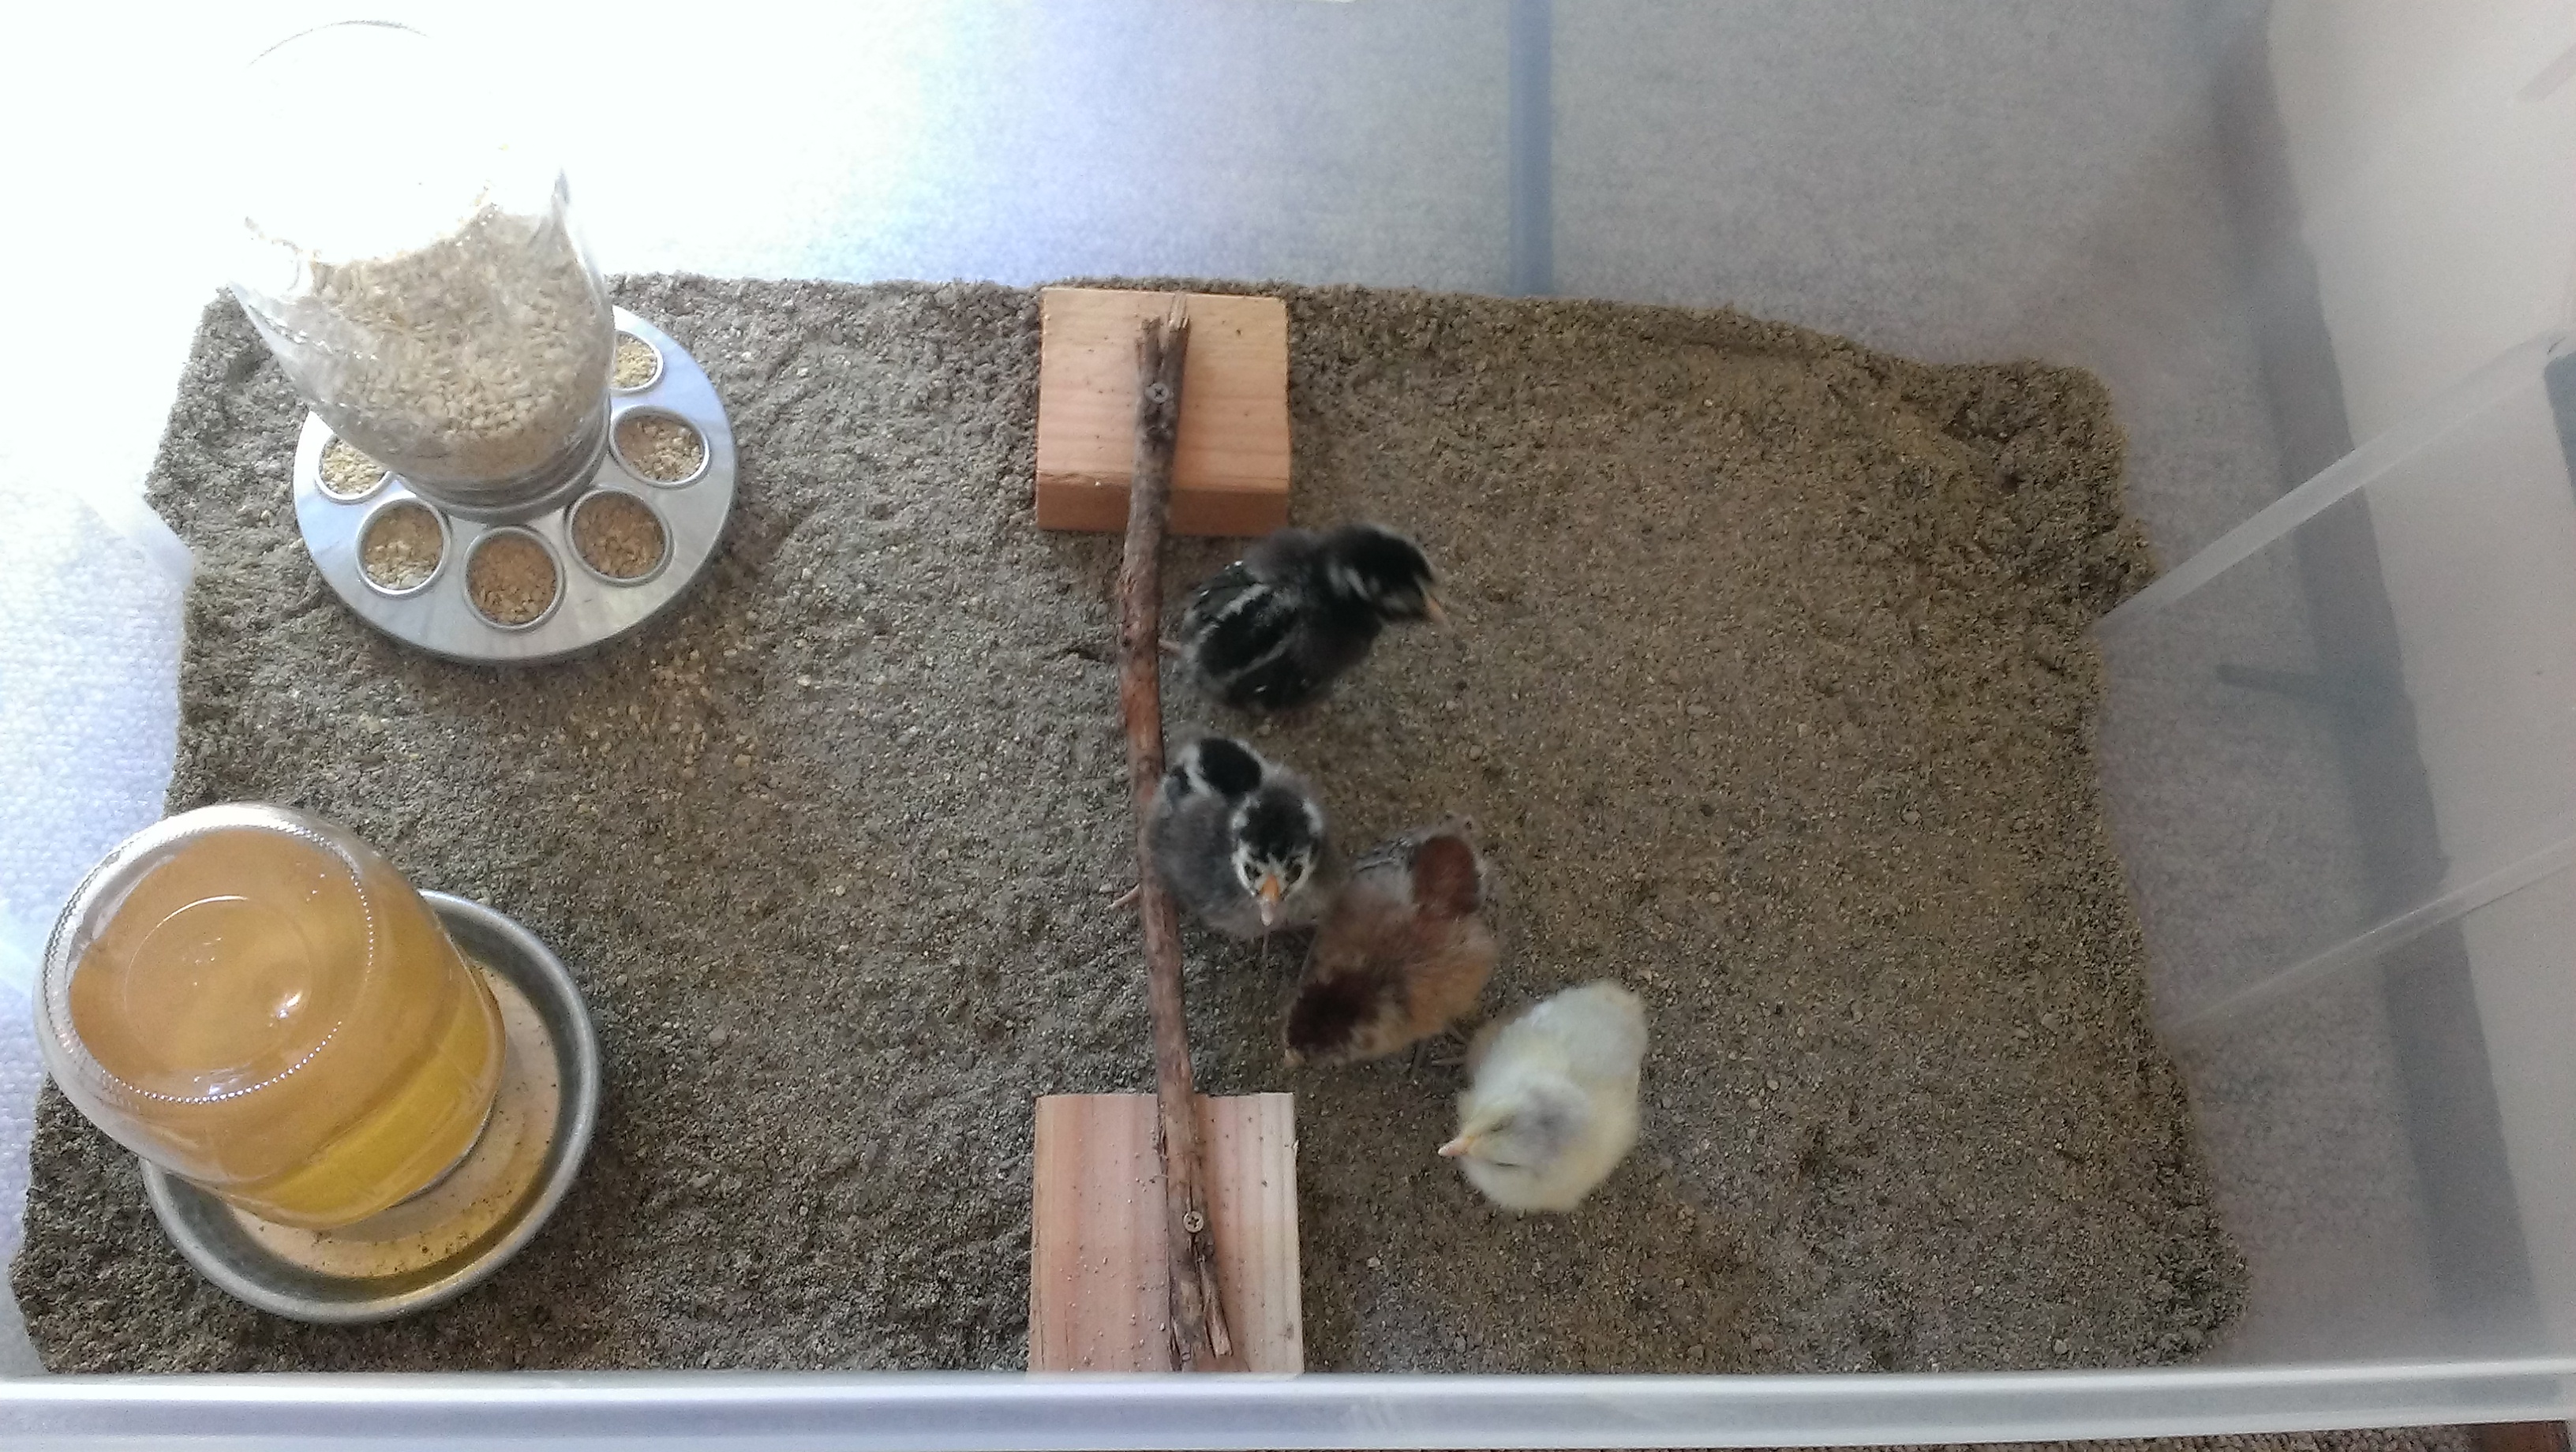
I always start off by advising that they get their brooders all set up and ready to go before they come to the store to get their chicks. A brooder is a temporary holding space for chicks to grow in all their feathers! Once they are ‘fully feathered’ they are ready to go out into their coop without the need for heat lamps.
My brooder was a very simple set up, but it did the job nicely! I purchased a clear rubbermaid-type storage container, a heat lamp and bulb, chick-start food and some water and food dispensers. I kept the babies in the office for about the first week or so then moved them into the garage once I was more comfortable with the whole thing.
I used sand as my bedding (more on that later!) and put in a few roosts so they could practice being good little roosting chickens!

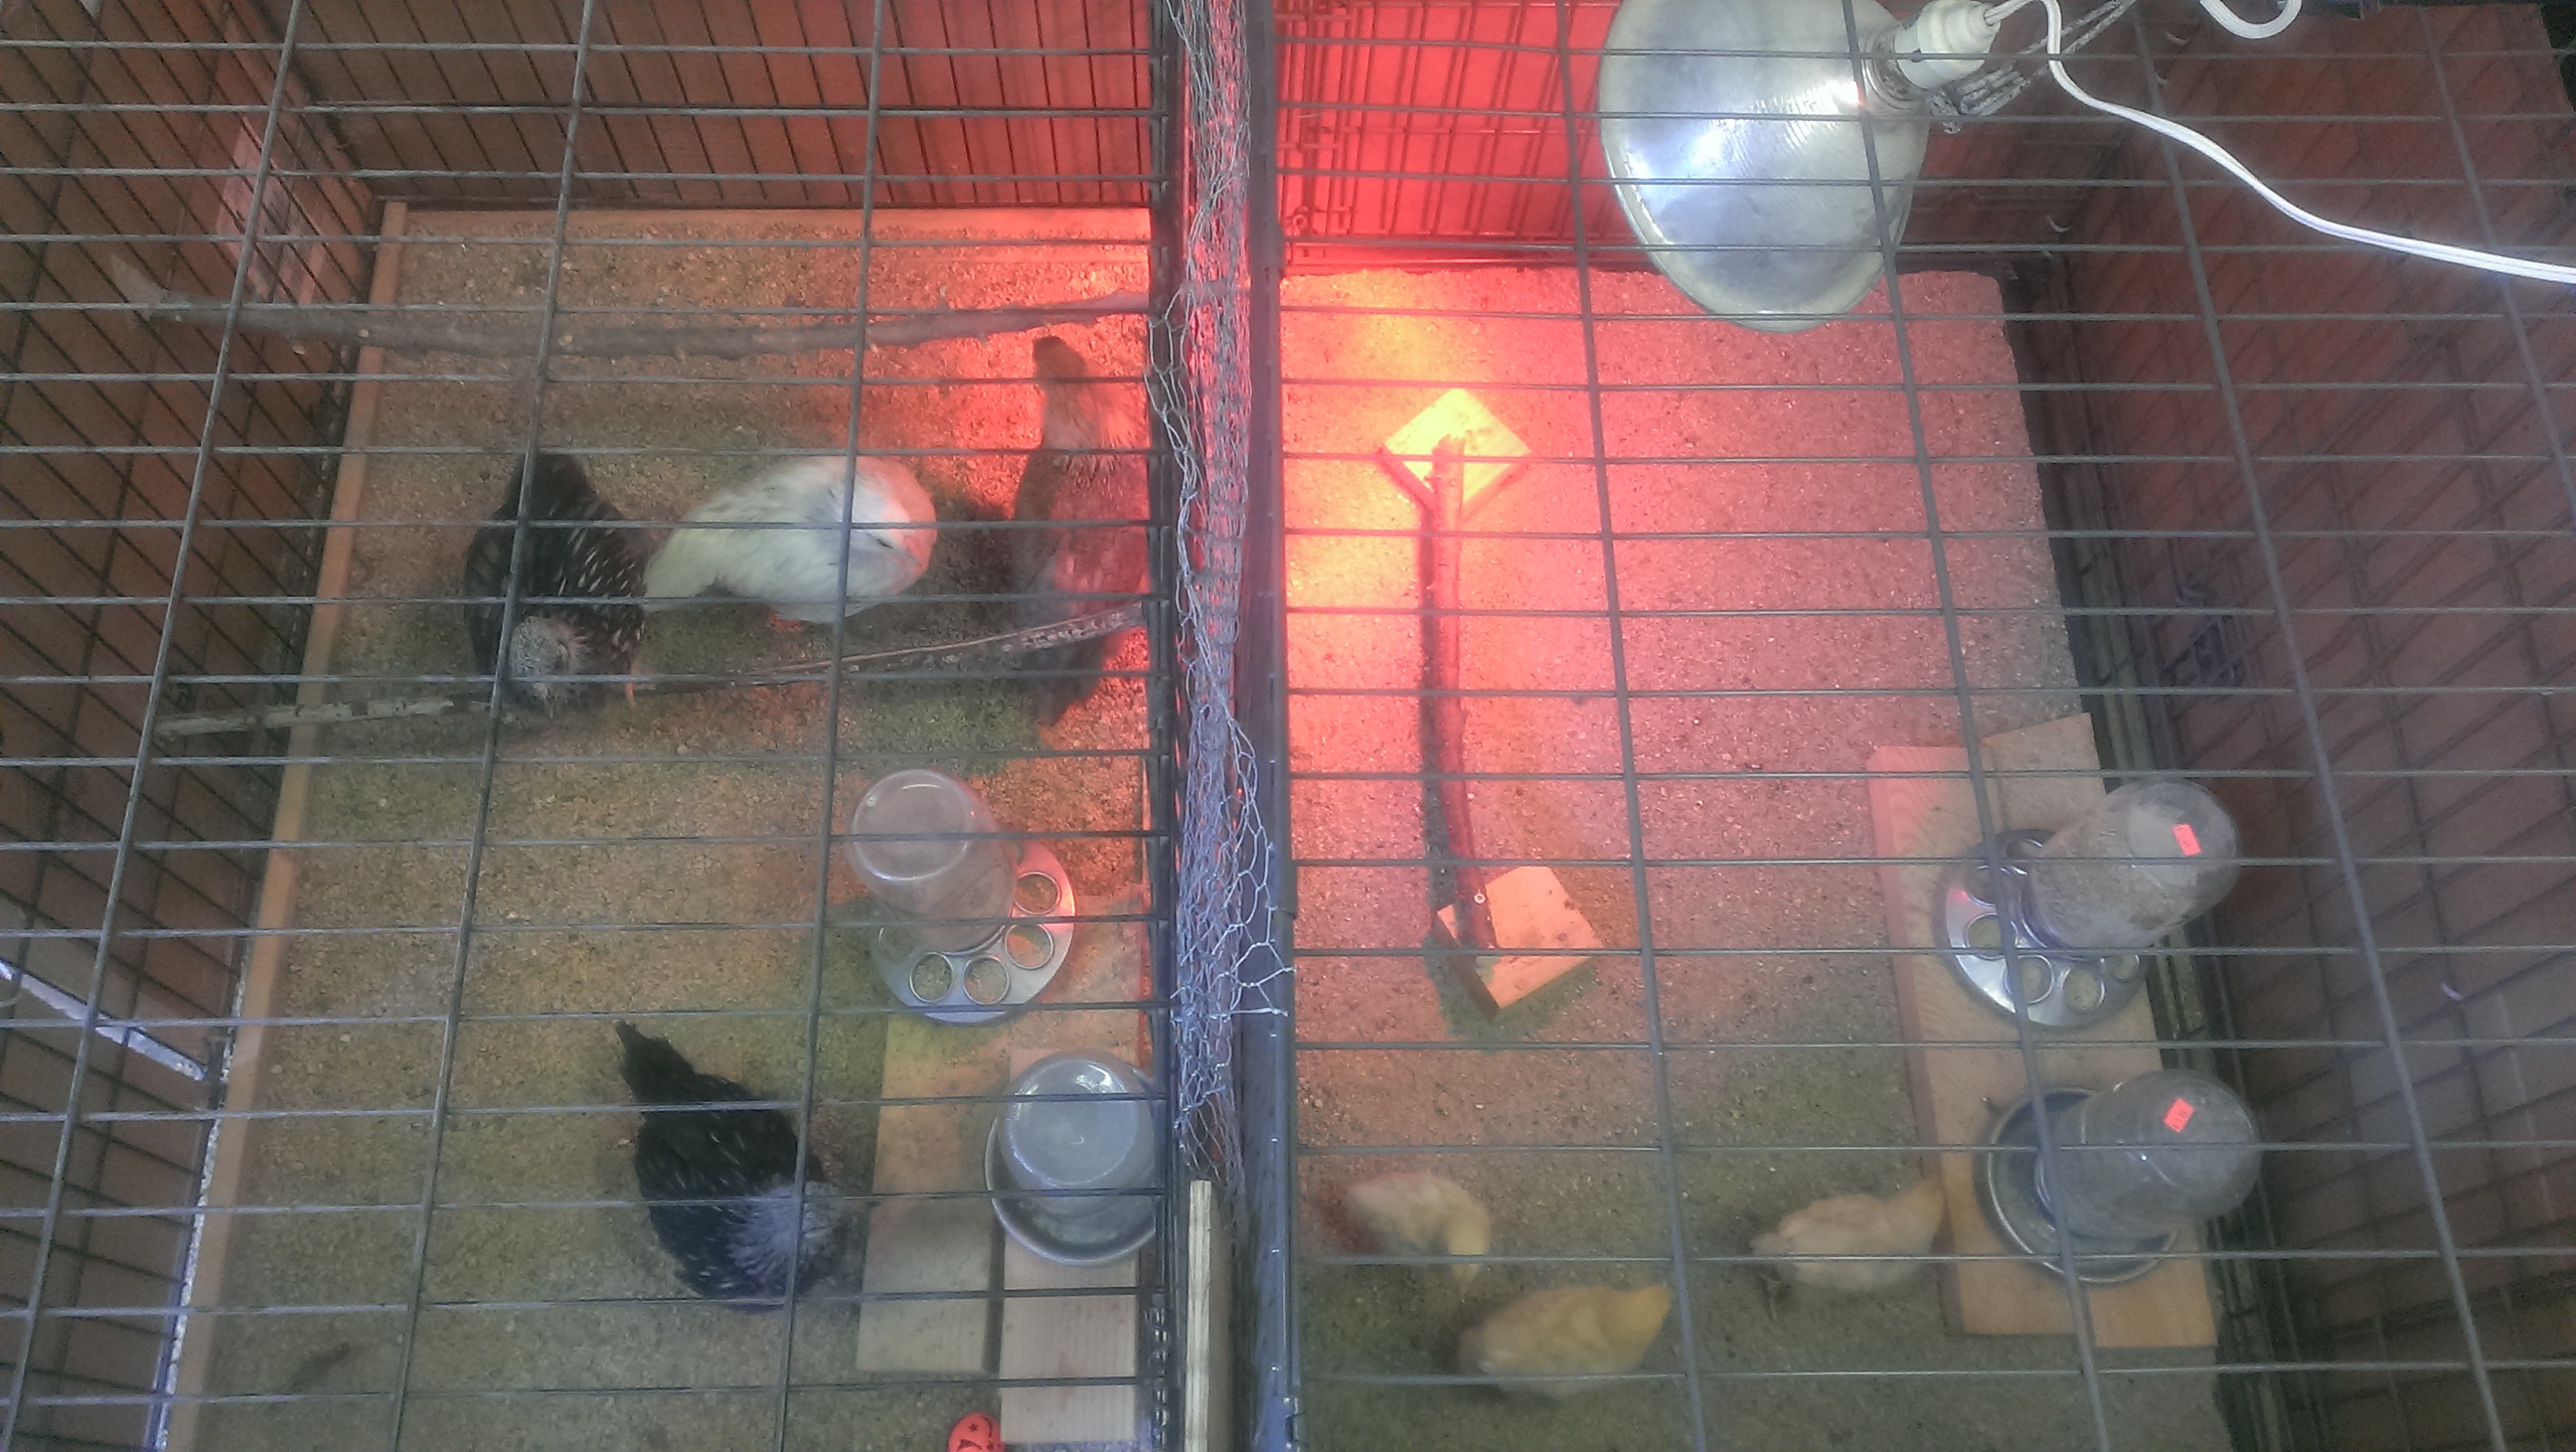
Chick brooder!
I started out with 2 Ameracaunas (easter eggers, if we’re being completely honest) and two Silver-Laced Wyandottes. The white Ameracauna turned out to be a rooster (I think he was about 14 weeks when I could tell he was clearly a boy.. I could be wrong about that), so I went on good ol’ Craigslist and put up an ad for a free rooster. I try and be very upfront about the fact that you MAY end up with a rooster when you get chicks. It’s never a sure deal and with as many ways as people say there are to sex a chick, most are going to end up being wives tales. You get what you get, so prepare yourself for having to choose an option of getting rid of said rooster if you cant have one or just plain don’t want one!
When I moved the brooder to the garage, I set it up to be predator proof, as there is no door on our garage. It was kind of like a set-it-and-forget-it thing.. just make sure they have food and water daily, clean the bedding, wait until the chicks are fully-feathered! As they grew into awkward teenagers, I moved them into a large dog crate. More room for activities!

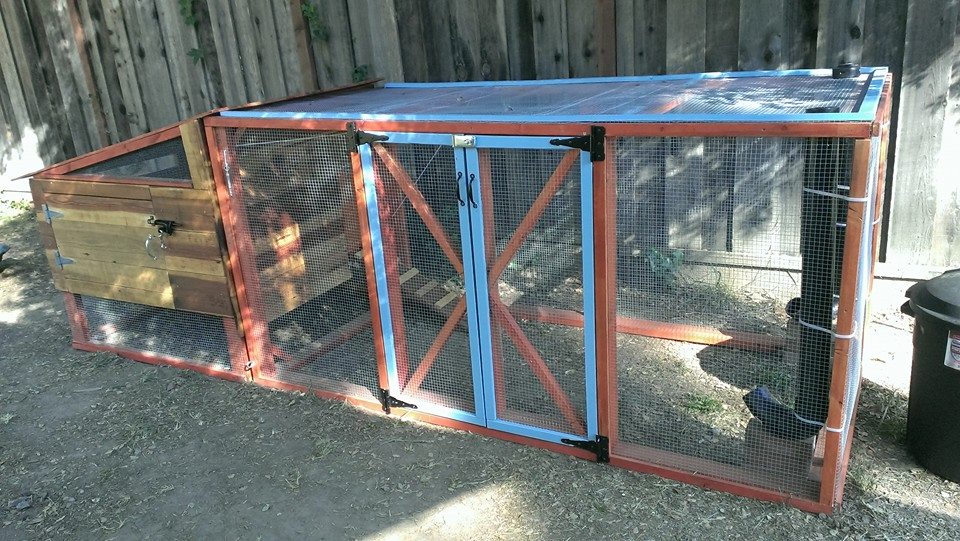
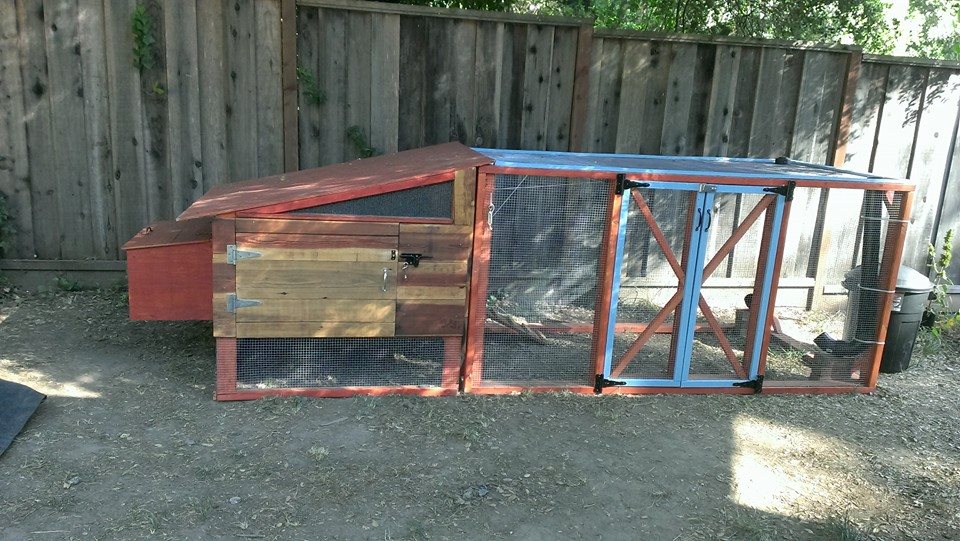
Patiently waiting for their coop to be built!
I did go back out and get 3 more chicks, because I realized I might bave a boy. I wanted to increase my chances of more hens and therefore eggs! It can be difficult to get 2 separate batches of chickens to get along , so I devised a system where the two separate flocks could get to know each other, but not hurt one another.

Each flock in their own dog crate, predator-proofed and butted up together, but separated by some chicken wire. This way they could see one another and interact. I set the heat light up in such a way that would also kind of force them to snuggle up together at night. The teenagers didn’t really need the heat lamp, but they would always get under it if possible.
The coop was finished a few weeks later (we were a little behind on it!) and everyone moved right in! We installed a gravity fed PVC pipe and a nipple watering system. Both of these ideas I got off Pinterest and they work wonderfully! I can refill the water once every 5-6 months (seriously, it’s amazing) and can refill their food from the outside of the run!

Water system not installed yet
 Let’s talk bedding! For the coop and the run. I had a few people make negative comments about keeping chickens and how badly its going to smell. I was bound and determined to have a run that didn’t stink!
There are several options for bedding in a chicken coop.. You’ll have to research and find out which one will work for you. Hands down I went with sand. Not any old sand, but river rock sand. Chickens have delicate respiratory systems and play sand or beach sand can damage their lungs. My local rockery carries what they call Sand #2, which is river rock, It’s gritty and not fine… it doubles as chicken grit (chickens eat grit to help digest kitchen scraps and other treats in their diet).
I bought sand for the run and coop, about 12 bags I think? Ran me maybe $20. I filled the run with several bags, enough to fully cover the hardware cloth that runs along the bottom inside to keep predators from digging in. For the inside of the coop, I wanted to ensure a stink-free situation. So I mixed the sand with some Sweet PDZ. Sweet PDZ is typically used as a stall freshener for horses, but it’s a wonderful ammonia absorber! I also mix in some diatomaceous earth for good measure (in the run, too!) to prevent fleas and other little pests.
Every few days I head out to the coop and scoop it clean. I use a compost rake, attached some hardware cloth and use it like a giant kitty litter scoop! Its easy and keeps everything smelling clean. If you want to use the chicken droppings for your garden, this is a great way to get just the poop! Just be sure to sift as much sand out as you can when you’re scooping.
I put golf balls in the nesting boxes right away so that they hens would get a good idea where they needed to start laying eggs. It worked great! 8 months into the chicken adventure and I have eggs everyday! some days 3, some days 6!
One final thing I want to touch on is Chicken Aromatherapy! Herbs are really great for a number of things in nesting boxes… they are insecticides and also have antibacterial properties, and can act as natural wormers, anti-parasitics, rodent control, stress relievers and laying stimulants. I have a large number of herbs growing in the yard, so every few weeks I take my hand sheers and a basket and I collect herbs! Rosemary, Thyme, Sage, Mint and rose petals. I cut them up, crush them a bit with my hands and scatter the herbs in the nesting boxes. They don’t seem to be bothered by my attempts with the herbs, so I’ll keep it up!
I have some ideas of an herb wreath for the front of the coop to keep flies away this summer… but at the same time, with the sand bedding and regular cleaning, I don’t get many flies!
More pictures of my hens and eggs to come!
xoxo